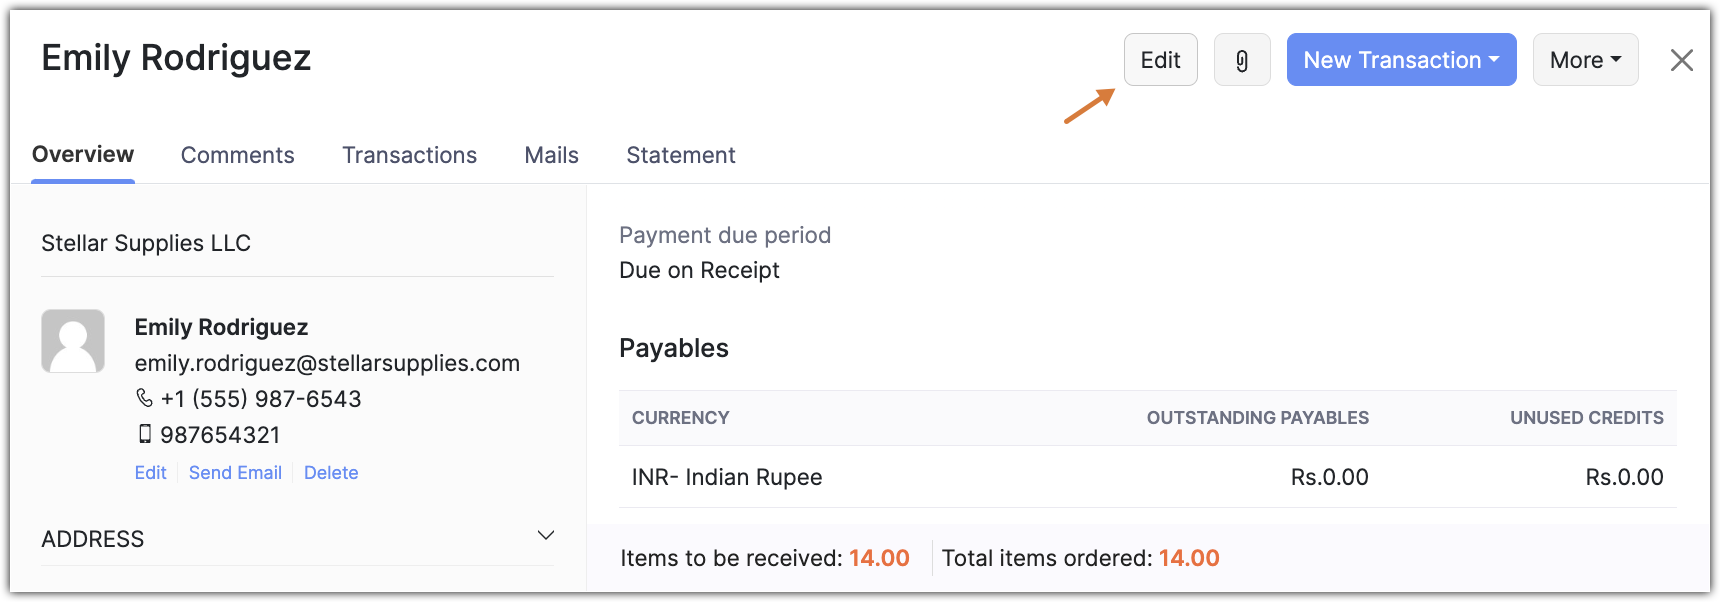
The vendor details page
Information about the vendor can be seen from the vendor details page. It consists of overview, comments, purchases, related lists, mails, and statement sections.
Primary Contact
The overview displays the information about the primary contact such as Name, phone, email, etc. You can send email, edit, or delete the contact's information from this section.
Address
The address section displays the vendor's billing and shipping addresses.
Other Details
Information such as GST treatment, source of supply, currency, payment terms, etc. will be displayed here. You can click the Edit icon next to the field value to make any changes.
Contact Persons
The contacts associated with the vendor will be displayed here. You can click the Settings icon to edit, mark the contact as primary, send an email, or delete the contact.

Payment Information
In this section, you can find the following:
- Outstanding Payables: The amount that you owe the vendor.
- Unused Credits: The excess amount that you have already paid the vendor that will counted as unused credits. This can later be applied to a bill.
Timeline
The history of all actions that took place with respect to a vendor will be displayed here. It includes information about updating contacts, purchase orders, payments made, and the user who made these changes. You can also click View Details to view the complete changes.
Purchases
All transactions with the vendor, such as Bill, Bill Payment, Purchase Order, and Purchase Receives, will be displayed here. You can click the + Add New button to create a new transaction.
Statement
This is where you can generate the vendor's account statement over a specific period. You can save it as a .PDF or .XLS file, print the statement, or send it as an email.
Actions that can be performed on vendors
Edit
In the Vendors module, you can select a vendor and click the Edit button to make changes.
Clone vendor
To clone a vendor
- Go to the Vendors module and select a vendor.
- Click More > Clone.
The vendor's details will be automatically populated.
- Enter the information and click Save.

Send emails
Emails can be sent to the primary contact, contact persons, or anyone who is associated with a vendor.
To send emails
- Go to the Vendors module and select a vendor.
- Click More > Email Vendor.

- Choose the appropriate email address from the Send To, CC fields.
You can also manually enter an email address. - Click BCC and specify an email address if necessary.
- Enter the Subject and Body of the email.
- Click the Attach Vendor Statement checkbox to attach the statement with the email.
You can click the Edit option to modify the date range. - Click Attach Files to add attachments from your device in the email.
- Click Send.

Link to customer
This option lets you create a relationship between a vendor and a customer. A retail store procures items from the vendor and the vendor in turn purchases some items from the retail store. So, in this case, the vendor is also a customer for the retail store. To manage all the transactions and monitor the outstanding receivables and payables, both the vendor and the customer can be interlinked.
To link a vendor and customer
- Go to the Vendors module and select a vendor.
- Click More > Link to customer.

- Select a customer from the drop-down list and click Link.


Merge vendors
When two vendors are related to each other, they can be merged. In some cases, a duplicate entry might be there in the Vendors module and each record might have a history of transactions. Deleting a duplicate record will result in loss of all transaction-related information. To avoid that, both vendors can be merged so that the transaction and other information are moved from the duplicate to the original vendor.
To merge vendors
- Go to the Vendors module and select a vendor.
- Click More > Merge Vendors.

- Select a vendor from the drop-down list and click Continue.
- Click Confirm.

Mark as inactive
If you're temporarily not purchasing items from a vendor, they can be marked as inactive. This means purchase orders, bills, and payments can't be created for that vendor.
To mark a vendor as inactive
- Go to the Vendors module and select a vendor.
- Click More > Mark as Inactive.

You can click the Mark as active button to activate a vendor.

Create a new transaction
Transactions with a vendor include Purchase Orders, Bills, and Bill Payments.
To create a transaction
- Go to the Vendors module and select a vendor.
- Click New Transaction and select the type of transaction from the drop-down list.

- Enter the required information and click Save.
Views and Filter
In List View, records can be filtered based on certain common parameters such as active or inactive vendors, duplicate vendors, etc. You can switch between various default filters or create a new one based on your requirements.
To create a custom view
- In the Vendors module, select the Views drop-down list.
- Click + New Custom View.

- Enter the Name and specify the criteria.
For example, when payables are greater than 10,000. - Hover over the fields in the Available Column and click the Add icon to view them in the List View.
- Specify who can access this view in the Share this with section.
- Click Save.

Customizing fields
The fields in the module can be customised based on your requirements. Apart from the default fields, custom fields can be added to the vendors module. A maximum of 44 custom fields can be added.
To add custom fields
- IGo to Settings > Preferences > Customers and Vendors.
- Select the Field Customization tab and click + New Custom Field.

- Enter the label name (field name) and specify the date type from the drop-down list.
- Specify the default value to be displayed in the field if required.
- Click Yes if you want to the field to be mandatory.
- Click Yes if you want this field to be displayed in transactions and PDFs.
- Click Save.
